The idea was to use padding lacquer, which is really shellac with lacquer thinner and some kind of oil for wiping lubrication in it. I would use that to burn into the existing lacquer finish (on the dining table) and then build shellac from there. Of course I had to mix my own to make sure it was fresh, and then I had to waste a bunch of money on additional resins to try to add durability.
Here's all the stuff. See all that wax in the bottom of the shellac jar?
Mixing up the buttonlac:
In the end I never really figured out the padding lacquer application technique, which is different than French polishing or just plain wiping, but still requires vigorous rubbing. I used 10% acetone to burn into the lacquer a little bit, but after failed experiments with the full concoction with mineral spirits lubrication on the end table, I backed off to straight shellac plus a small percentage of Paraloid B-67 for the dining table. The technique I used was just plain padding as described by Jeff Jewitt in his books. Basically you make a fist full of cotton, pour shellac on it, wipe in straight strokes, and repeat until it starts to stick. Then you wait half a day, sand, and do it again. Repeat until it looks like you want. It works for me.
First, a faded end table to practice on:
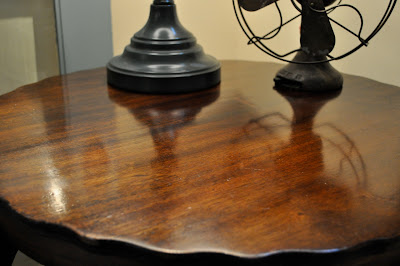
It came out pretty good after brushing one coat, wiping three more, wet sanding with 400 and 600, and rubbing out with steel wool and paste wax.
Here's the bare state:
Here's all the gear for sanding and finishing:
After the first wet coat was brushed on:
With all the finish on after building with the wiping pad:
And rubbed out with steel wool and paste wax:
I could have spent more time sanding, but it came out fairly smooth with all the patina intact and much improved color. Mission accomplished. We'll see how long it lasts.
EPILOGUE: About four days. That's how long until a hot dish (on a pad) burned through and melted a nice pattern in an 8" square area.


